
tips
Amazon Fresh Review
Wednesday, July 26 • amazon, amazon fresh, college, cooking, quick guide, recipe, review, student, tips
 |
| Photo from Google Images |
Last week was a super busy week at work and I ended up working double my normal hours (I'm usually a part time employee). While I loved working extra hours, I didn't like the fact that I didn't have time to go grocery shopping! On Friday night, I realized we had no food in the fridge and didn't have time to go to the store on Saturday. So, I pulled up Amazon Fresh on my phone and started adding items to my cart (while laying in bed)!

On Saturday, after work, we finished adding all of our groceries to our cart and set up a delivery date. They had a lot of different time slots for the next day so I selected between 7-10am. Unfortunately my cous cous wasn't going to be available during that time slot so I had to remove it from my cart (but I think they would have just delivered it at a later time if I chose to keep it.) On Sunday morning, around 8am, I heard someone set something outside my door and my husband opened the door to find our groceries sitting on our doorstep a couple minutes later.


At first both my husband and I were unsure about ordering produce and meat because we thought they would just give us whatever they had on hand, instead of picking out quality items. However, when we received our Amazon Fresh order we were thrilled to find that the produce they picked out was of top quality and the pound of meat was better than something we would find at the grocery store! The bananas were a little on the green side but that is just how my husband likes them so it was perfect. We are going to order more fruit with our next order to see if it is of equal quality.
Amazon Fresh is a little bit more expensive than going to the traditional grocery store. It is $14.99 per month on top of your prime membership and some of the produce, meat and dairy is a few dollars more than it would be at Safeway (Vons in California or Pubix in Florida). For example, a 1lb block of cheddar cheese is $7 on Fresh and $5 in our local store. But it wasn't too big of a difference for me to complain.
One complaint I have is that they weren't super careful while packing the food. Our bread got squished and the grapefruits were under some heavy items. Other than that, the food was all in perfect condition and everything from our order was in the bags!
I will definitely be using Amazon Fresh again for my grocery needs. I think it is perfect for the working household who doesn't always have time to go to the store and stock up. Has anyone else tried Amazon Fresh? Let me know your thoughts on it in the comments below!
5 Steps to Land Your Dream Job
Monday, June 19 • advice, college, how to, milso, quick guide, student, tips

1.
Be prepared: Before you even apply for your next
job, you need to be prepared. A lot of professionals have given me advice to
dress for my next job in my current position. This may sound silly but it can
put you in the mindset of your next position. If you are looking to become a
manager then dress like one!
Also, be strategic in your job hunt. Search
through Linked In and connect with professionals who are currently working for
the company you want to work for or have the title you are striving to get. Some
companies even let you job shadow (if you’re applying within the company) so
you can get a feel for what your workload would be. It is really important that
you take these opportunities and ask as many questions as you can.
Once you find your dream job, then it is
time to apply, apply, apply! I had to apply a few times to get into the
position I am now, and I’m beyond grateful that I kept reaching for my goals. It
is easy to get discouraged when you get turned down, but just remember what
motivated you to apply in the first place and keep pushing forward!
2.
Job description: A job description is the
position roadmap. It will outline what you will be doing and the
minimum requirements to be considered for the position. One technique that I
have been taught is to print out the job description before you create your
resume. Once you print it, highlight everything you do in your current position
under responsibilities and everything you can do under the qualifications. You
can also underline key words such as “analyze, assist, research, provide, etc.”
The job description is the best way to know what the hiring manager is looking
for so make sure you know it very well.
3. Resume: Resumes are a tricky art so I’m going to
try and keep this section to a few key points.
First off, you will want to create a master
resume. This is a document where you will be able to maintain your skills,
qualifications, accomplishments and everything you have done; but never
actually submit to any managers. You want to make sure and update this
periodically so it current.
Once you find the job you’re wanting to
apply for, and have highlighted all the important info, you’re ready to start
creating your specific resume. It is important to have a specific resume for each job you are applying for instead of a general one that you submit to multiple jobs. Your specific resume is going to be portions of
your master resume that are specific to the job you are applying for. To tailor
your resume, it is good to include a key qualification section that will hook
the hiring manager and spotlight what makes you the best fit. Also, tie in some
keywords from the job description if you can.
Finally, format and design play a large role
in building a great resume. A few tips I have learned while talking to hiring
managers are: do not exceed two pages, balance the white space vs text, don’t
have a fancy template that is hard to follow, and use a basic font around 12pt.
Also, your resume must be consistent. Don’t use a period after a sentence on
one bullet point and no period on the next bullet point. Make sure you are
bolding and italicizing consistently throughout; instead of having random bold
words. And finally, remove clutter from your resume. Don’t write “references on
request” because if a manager wants references, they will automatically request
it. Don’t put irrelevant hobbies or clubs that you participated in and do try
to convey your thoughts in the shortest way possible.
4. The interview: Woo, you made it to the interview!
This part can be extremely nerve racking but the biggest tip I can give you is
be confident. A manager’s goal is to get to know who you are, not who your
nervous self is.
The best way to gain confidence is to be
prepared. Ask your friends or family to do mock interviews with you and become
familiar with articulating your answers. Get a good night’s sleep the night
before your interview and set out your professional outfit before you go to
bed. When it comes to interview attire, it is always better to be overdressed
than underdressed. Your attire should be all business, even down to the
notebook and pen you bring with you to the interview (yes, you should bring a
notebook and take notes).
When you get into the interview room, shake
hands and make eye contact with each person. Make sure you engage each
individual in the room if you have a panel interview.
To conclude the interview, the hiring
manager will probably ask you “do you have any questions for me.” You
absolutely have to have questions to ask them! It is a good idea to come up
with three to five questions to have ready for the interviewer before
you even step foot in the room.
There are a lot of do’s and don’ts to
interviewing but the best thing to do is be authentic and show the interviewer
why you deserve to be in the position.
5.
Follow up: After the interview, follow up by
sending the manager a thank you note (handwritten is best but an email works
too) no more than 24 hrs after the interview. If you get the job, congrats! If
you don’t, get feedback on how you can improve your next interview and keep
pushing forward.
-->
Finding a job and developing your career are very
challenging. However, if you put your heart into it and are motivated to reach
your goals then it is 100% possible! Good luck to everyone out there!

Computer Glasses Review
Monday, November 14 • fashion, quick guide, review, southern belle, tips
 |
| I ordered the Hepburn style -- of course :) |
I recently ordered glasses from EyeBuyDirect that are good for the computer. Unfortunately my vision has slowly been going downhill so I have to wear glasses. These glasses from EyeBuyDirect are awesome because they protect your eyes from the glare of computer and phone screens. Since I sit at my desk and stare at a computer all day, these were a must try for me!
I have been wearing them for about a month now and I love them! They really make a huge difference in my eye fatigue during the day. I used to come home and not even want to watch TV because my eyes hurt so bad. Now the eye fatigue is basically gone with these glasses.
I chose EyeBuyDirect because I had heard good reviews from them and now I will give them good reviews. It was a little scary picking out glasses online since you can't actually try them on. However, they have a feature where you can upload a photo of yourself and "try on" different glasses. Once you order them, EyeBuyDirect is great with keeping you up to date with where your glasses are in the process. They emailed me when the lenses were being cut, fitted, checked and shipped. If I was unhappy when they arrived, I had a couple weeks to return them for something different - but I loved mine so I didn't have to return them!
I highly recommend these computer glasses for anyone who uses their computer or phones a lot during the day. They are super cute and functional! To get $10 off your purchase, use my code: IFFKQSI26J
Here are a few ways you can style them for different occasions :)


House Tour: Part 1
Wednesday, June 15 • diy, engaged, fashion, girly, interior decor, milso, photography, quick guide, review, room tour, round up, southern belle, tips
At the beginning of the month, Daniel and I signed a lease for our first house together. We were able to move in right away, which was very nice after living in the Navy Gateway hotel for 12 days. Moving and loading/unloading the truck was the worst; however, unpacking our boxes in our new home was the best! I’m slowly getting everything put together, so these next few posts will be a series of “our new home, room-by-room.” I’ll try to post every Wednesday so keep an eye out for the rest of the tour. For today: the master bedroom and my closet (we have four closets so I’m going to feature one of the four).

The bedroom is a bit small, but has enough room for our bed and nightstands. Yes, those are Build-A-Bears that Daniel and I made for each other: “Jedi Steve” and “Princess Lillie.” The cubes that we use as night stands are actually from Walmart. They are made with strong composite wood and t-design which makes for a sturdy structure. They also look very nice. We chose the espresso finish because we found that it goes well with any color of bedspread.

While attending college at WSU, I purchased this New York City canvas print from Ross. Since it has traveled with me from Pullman to Spokane and now to Florida, it was the first picture to be hung in our new home here, in Florida.
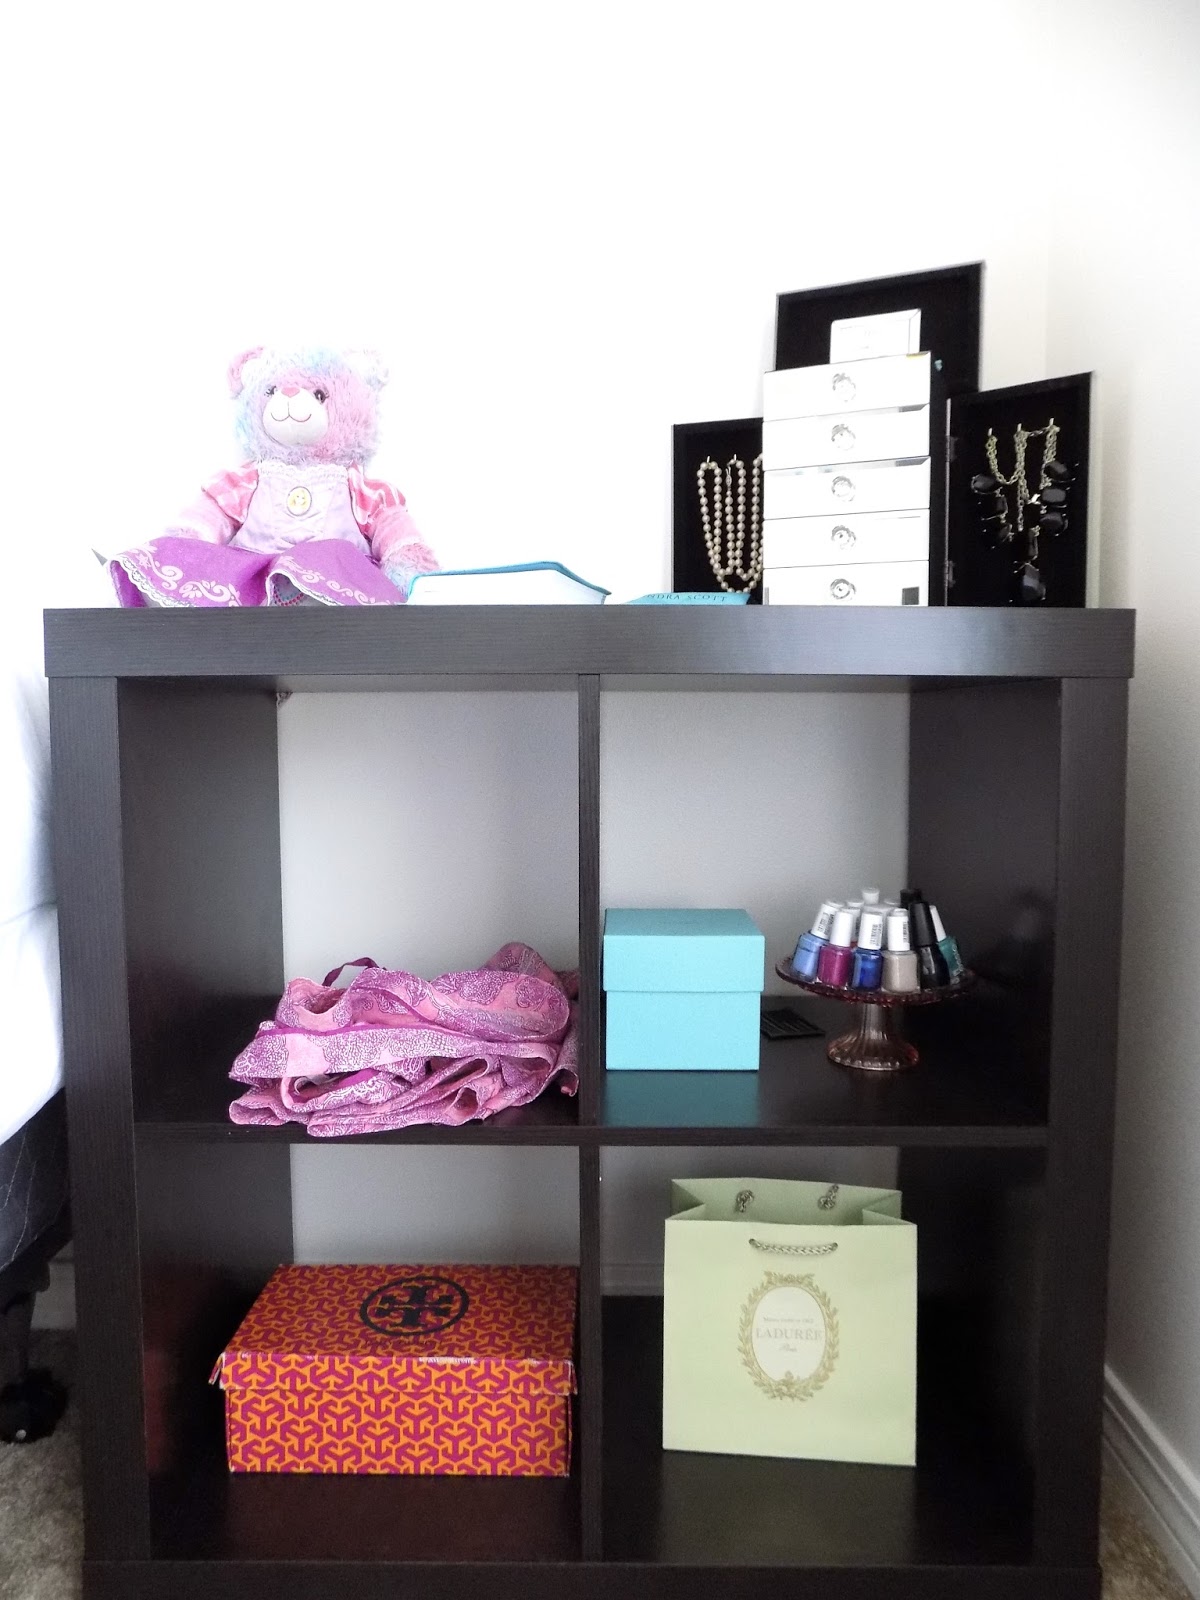
The little details – pajamas // nail polish on a cake stand // shoebox full of electronic chargers // Lauree bag from a family trip to New York City // jewelry box // Build-A-Bear

One of the best parts of our bedroom: a walk-in closet. I’ve never had a walk-in closet so this is pretty amazing to me. On the left, I hung all of my work pants and skirts; in the middle, I have color and season coordinated the clothes; on the right, there are more of my work clothes and Daniel’s uniforms. I definitely have a “Pacific Northwest” closet with neutral colors. What can I say? Once a Washingtonian, always a Washingtonian. (: However, that being said, I am slowly adding some “Southern” personality to my closet.

While I was wandering through Target (one of my favorite pastimes), I found these really cool hangers. I love them because I can hang my favorite pairs of shorts and hook them together so they don’t occupy much room in my closet. These will also work well for work pants so I will be making another trip to Target soon!

Finally, in the corner I have my dresses and a few sweatshirts. I left most of the sweatshirts boxed-up since I will rarely need them here but I did pull out my favorites to hang up.
Well, I hope y’all enjoyed the first of my house tour! Let me know, in the Comments section, if you want to see anything else in the bedroom/closet. Check back next Wednesday for the next episode. Until then, have a good week!

Spring Break Packing List
Thursday, February 25 • adventure, fashion, milso, packing list, quick guide, southern belle, spring break, texas, tips, travel

Spring break packing list:
Hi friends! Spring break, for me, is only two weeks away and I couldn't be more excited! This spring break I am heading down to Texas to visit my fiancé and soak up the sun. I am a total planner and always pack a week or two before a trip haha. This year, I decided to share my spring break packing list with everyone else. This is a list for those of you going to a warm place for a week:
- 3-4 swimsuits // swim coverup - PFG or dress
- 3 t-shirts // 2 tank tops // 1 long sleeve shirt
- 3 pairs of Nike shorts // 2 pairs of denim shorts // 1 pair of pants or leggings
- 1 "going out" outfit
- 2-3 cute dresses
- 1 sweatshirt
- pajamas
- sandals // wedges // tennis shoes
- cross body purse or fanny pack // nicer tote bag
- jewelry - remember that anything you bring might get messed up in travel so don't bring anything too special to you
- sunglasses // croakie
- hair supplies - brush, bands, curling iron, blow dryer & hairspray
- makeup // makeup remover
- face wash // clarisonic
- medication
- sunscreen
- other necessary toiletries
- wallet // cash // cards - license, school id, debit, credit
- camera // computer // phone // chargers
I hope everyone has a fun and safe spring break!! Thanks for reading my blog (:

Shop this post:
Study Tips
Friday, October 30 • college, how to, quick guide, student, study, tips
TIP 1: Go to class!!
I made the mistake of missing more class than I should have my freshman year. I thought to myself "well I'm tired today so if I just study at home and read the lecture slides, I'll be fine." How wrong I was!! Going to class is the #1 way to help you succeed. I'm not saying that missing 3-4 classes will make you fail, I'm just saying don't skip unless you really have to!
TIP 2: Turn off your cell phone in class
I honestly texted in class a lot until last year. I never really made the connection that texting in class is the same as not even going! When you get to class just put your phone on do not disturb and listen to the professor. If you need to check your phone once or twice, that is fine. Just try your best to put it away and really focus on what the professor is saying!
TIP 3: Plan ahead
If you haven't already, go to the store and buy a planner or a calendar! I have 2 calendars, a planner, and my phone; no joke. If you plan ahead, you are able to write your essay and get it edited, be able to hangout with your friends, study for the upcoming exam and most importantly sleep! When you know what you have to do, and you do it before the due date, then you can stay on top of your semester. Biggest take home from this tip is DO NOT PROCRASTINATE!
TIP 4: Don't go out and party every night
I know this is a fun thing to do when you are in Greek life, a freshman or 21.. but its not going to help you ace your next exam! Stay away from "Thirsty Thursday" or "Margarita Monday." You're probably asking right now "how are you supposed to have fun in college?" The answer is, party on Friday or Saturday but then get your life together and focus on school! You go to college to get the degree, not the alcohol.
TIP 5: Try not to get too stressed out about your future
I am kind of a hypocrite for writing this tip because I am so stressed out everyday about what I'm going to do when I graduate! However, everyone always says have an idea of what you want to do and set a goal for the future. Reach for that goal but don't freak out if you change your mind! I have changed my major 3 times in college (biochemistry, bioengineering and finally accounting). What I found to be most helpful in deciding was taking a class and really enjoying it and then talking to my professor. She gave me a lot of advice and really encouraged me to switch. If you are unsure about what you want to do, don't stress, just go talk to an advisor or professor and ask why they picked their profession!
TIP 6: Get to know your professors
The best way to do this is to go to their office hours and ask them a question about the class or the homework. I don't recommend going up to them on the first day and introducing yourself because they have so many people do that on the first day! The best way to get to know your teacher is by talking with them one-on-one in their office.
TIP 7 (final tip): Just try to do your best with balancing school and life
Don't make yourself sick from worrying about grades, don't hastily pick a major because you feel like you have too and do have fun! College is a time in your life where you really learn how to be on your own and manage your own life. It is a fun and challenging time; so do your best to make good decisions and enjoy it!! You only get your undergrad once :)
How I study for exams and stay organized:

1. I take notes on the slides in class and on what the professor says. I tend to write down mostly what the professor says because they mention things that aren't usually on the slides!

2. I try and come home and type up the day's notes, but with 4 classes and homework it is difficult to do! I find myself going through the notes the weekend before the exam and typing up all of them.

3. Most of my professors, and books, have "learning objectives" that I will go through and make sure I know.

4. When I'm finished typing, I print them out and put them into a binder along with my homework assignments. I got the idea to use clear sleeves from another blogger (Mackenzie Kendall) and I love doing it! When your notes are in clear sleeves you don't have to worry about the pages tearing out or having to punch holes.

5. I make a crib sheet full of notes from the chapter, homework, slides and my class notes! Most of my teachers will allow the use of a note sheet on exams but even when they don't allow it, I still make the sheet for quick study references!

These tips and techniques have been working for me so far, so I hope they will help the rest of you!! If you have any other suggestions, add a comment (I would love to know how everyone else aces their exams)! Good luck this semester!! Thank you for reading my blog!

Subscribe to:
Comments (Atom)
